SeisComp3 - Automatic Detection
Contents
![]()
我会用几篇的博客内容来记录对 SeisComP3 的学习总结。前几篇已经实现了(实时)波形数据的获取,接下来进入数据的处理阶段。本篇主要介绍 SC 3 如何自动检测事件,因为事件不是随时发生的,此处我利用 msrtsimul 模拟事件的实时数据流环境。
1. Phase picking
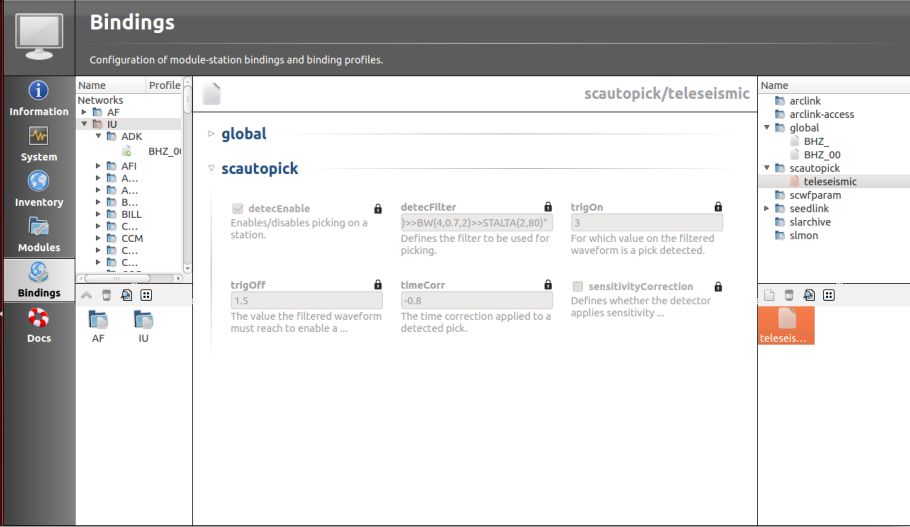
首先,配置震相拾取,主要用到的模块是 scautopick - SC Auto PICK。scautopick 根据波形振幅的变化搜素相似性。基于的算法是 sta/lta, 默认的滤波频段为 0.7-2 Hz,阈值为 3。
打开 scconfig,进入 Bindings,右击右侧 ‘scautopick’ -> ‘Add scautopick profile’。命名为 “pick_teleseismic”。然后拖入左侧 IU 台网中。保存。
开启以下模块:scamp, scautopick, scautoloc, scevent, scmag。
# Find anomalies on the continuous signals. They are called detections and/or picks.
Module: scautopick

# Group detections and try to find the hypocenter of the earthquake.
# To continue the terminology, a hypocenter in the context of SeisComP3 is called a location.
Module: scautoloc

# Determine the magnitude
Module: scamp / scmag

# Associate the located hypocenter with an incident. In seismology incidents are called events.
Module: scevent
$ scrttv命令查看实时波形,看是否有变化(某些波形有红色的标记)。
2. Simulation
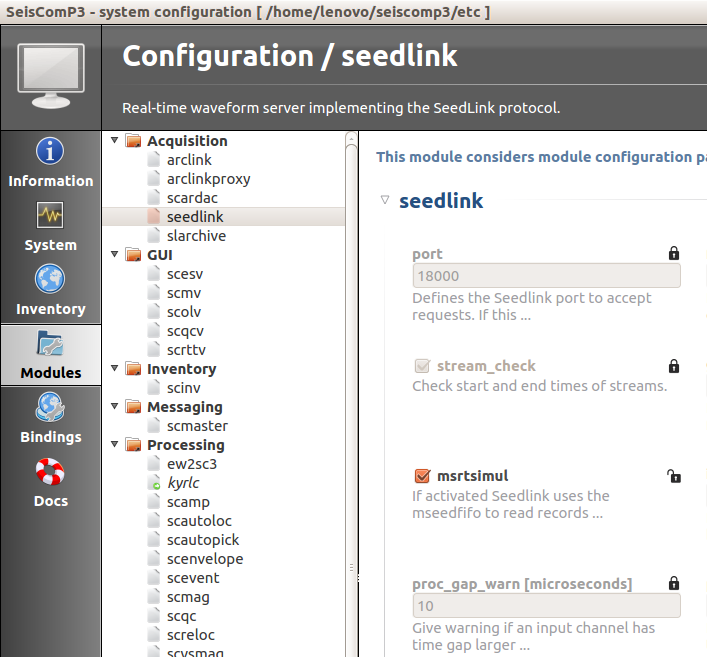
msrtsimul - MiniSEED real time simulation,通过将 miniSEED 放入 seedlink buffer 来模拟实时数据环境。
进入 scconfig -> Modules -> Acquistion -> seedlink,激活 msrtsimul。
进入 scconfig -> Modules -> Processing -> scautopick -> picker, 替换为"AIC”。
$ seiscomp update-config
$ seiscomp start

$ msrtsimul 2011-03-11_M9_Tohoku_Japan.mseed
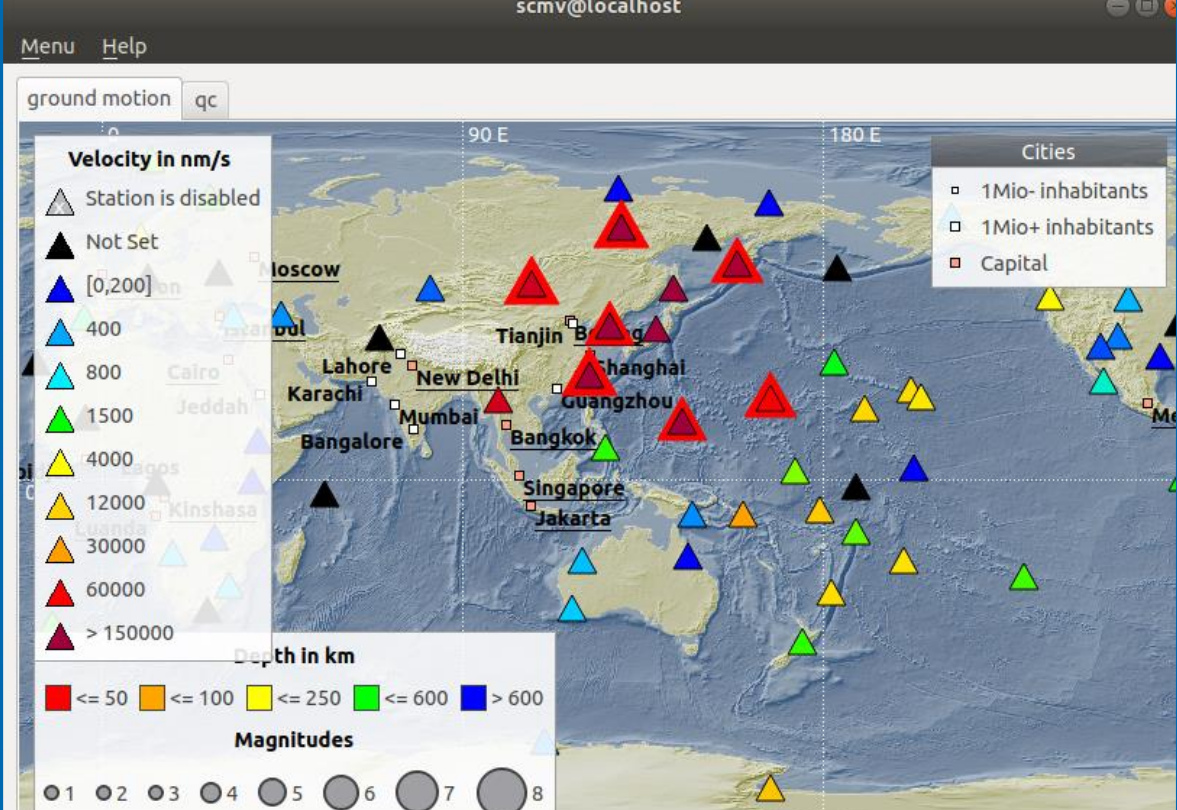
不要关闭 msrtsimul 终端,另开一终端,分别 $ scrttv; $ scmv查看事件。
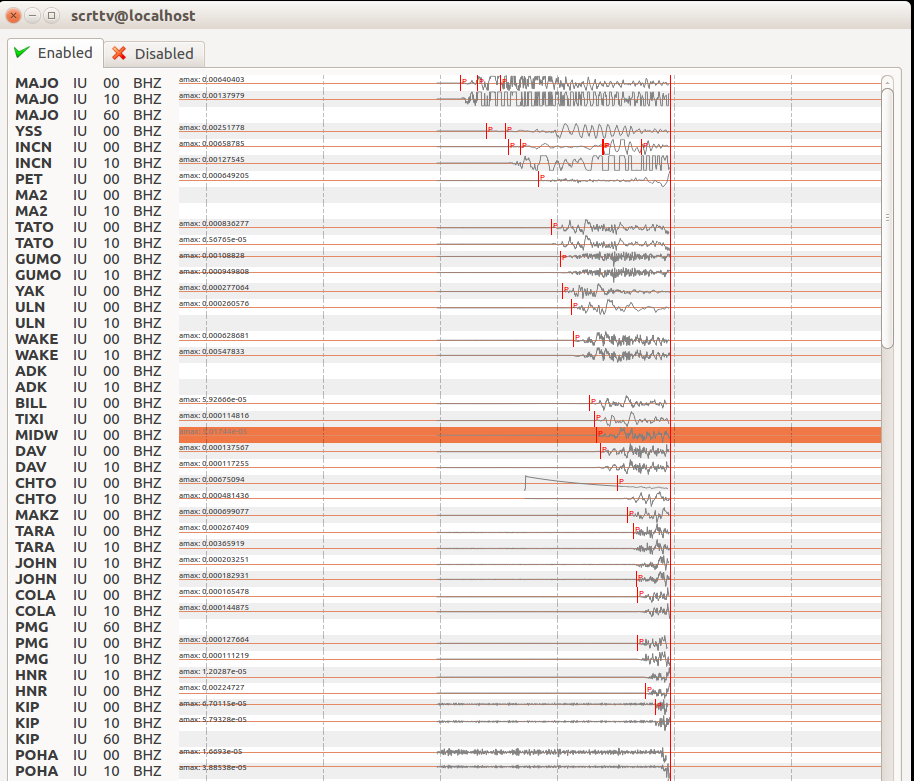
注:P波被红色竖线标记。在模拟过程中,如果 seedlink 还缓存有前面的波形以及震相标记记录,可能会影响本次操作中震相的标记。所以需要清除 seedlink 缓存:
# clean out seedlink buffer
$ cd ~/seiscomp3/var/lib/seedlink/buffer
$ rm -rf *
$ rm -rf .dummy/
# scrttv 波形界面的震相标记清除: interaction -> clean picker markers
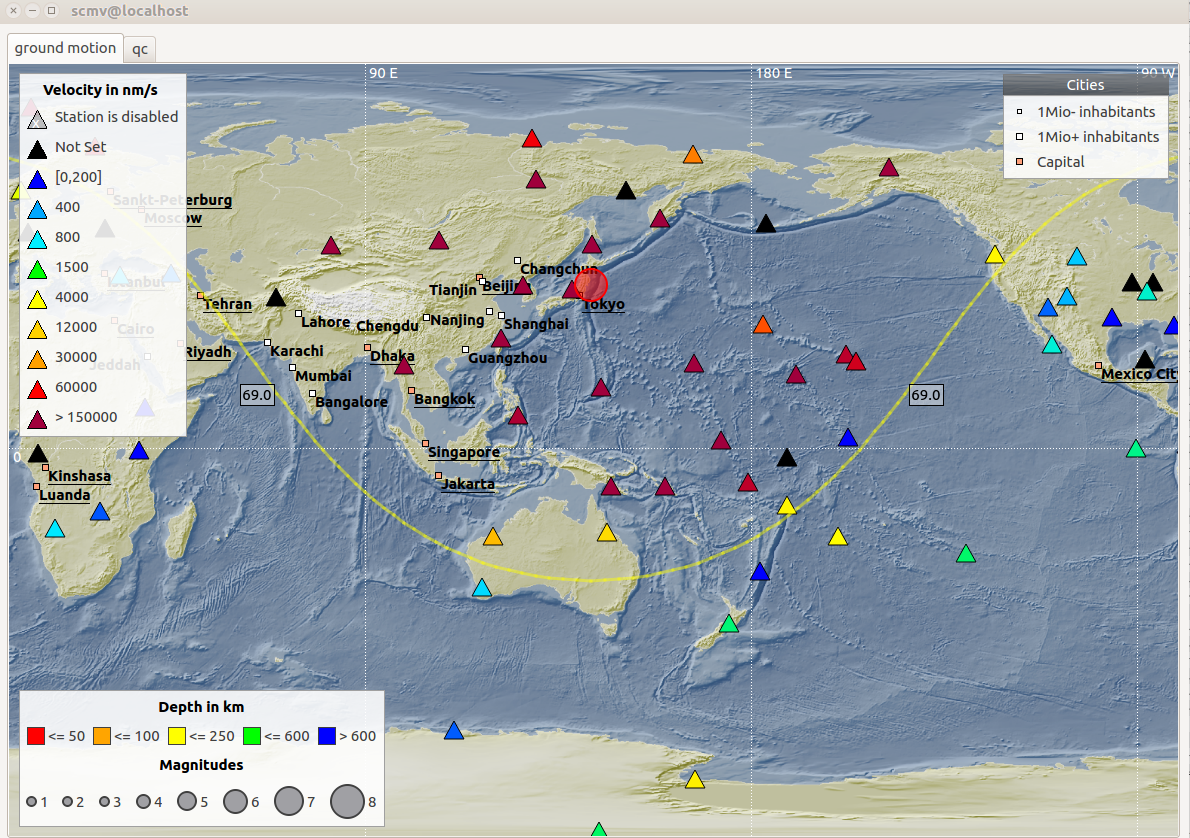
注:已经探测到事件。
3. Event detection
通过 scmv 命令看到有事件出现时,可以利用 scolv 命令查看事件详细信息:
$ scolv
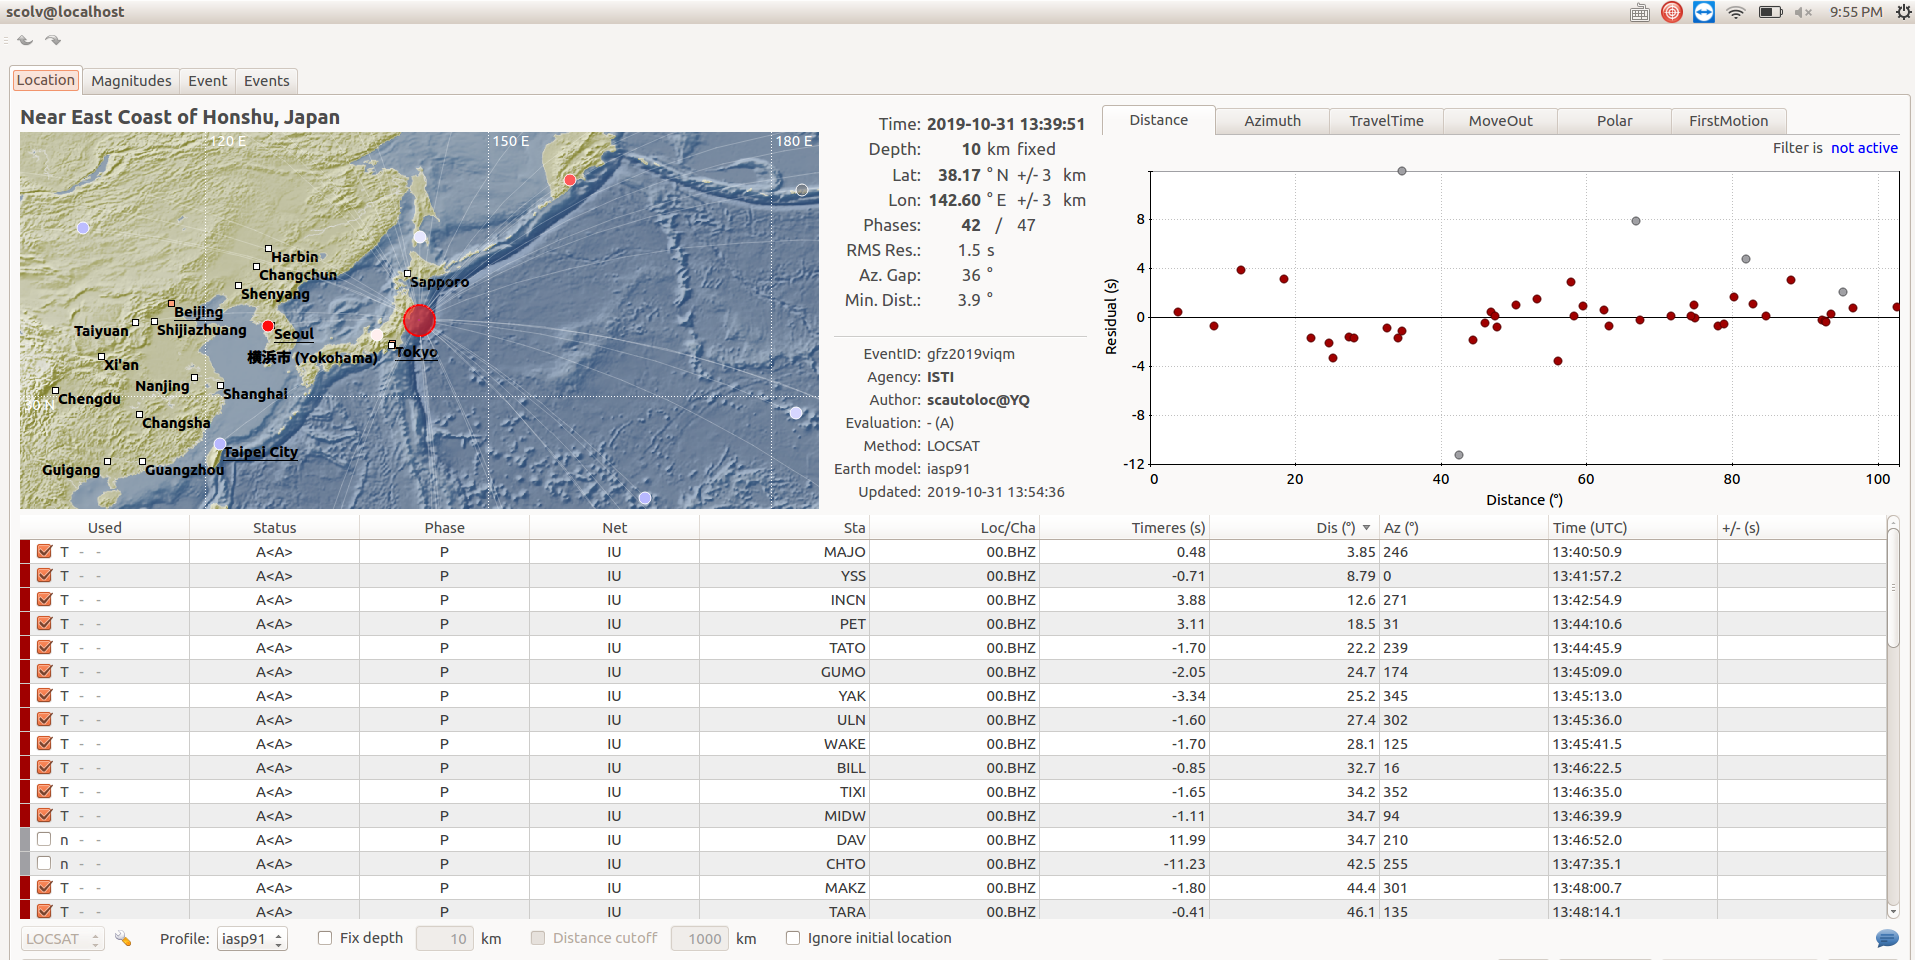
注: SCOLV - SC 3 Origin locator view. Scolv 可以打开图形交互界面,用来审查和修订事件信息,例如被标记的震相,事件位置,深度,发震时刻,震级,事件等,详细请看 https://docs.gempa.de/seiscomp3/current/apps/scolv.html .
下一篇内容:SeisComP3 近震和小震检测。
Author Qiang
LastMod 2019-10-27